Effortless Mini Cheesecake Bites
Highlighted under: Tasty Pastries
I love making these Effortless Mini Cheesecake Bites because they combine simplicity with a delightful taste that never fails to impress. Whether it’s for a party or a cozy night in, these bites are perfectly portioned and incredibly creamy. The best part? They come together in just a few minutes without any baking required. The crispy crust and the velvety filling make for a winning combination that I can’t resist. Trust me, once you try these, they’ll become a staple in your dessert repertoire!
When I first decided to create these mini cheesecake bites, I was inspired by the idea of having indulgent desserts that are quick to make. I tested various ratios of cream cheese to sugar until I found the perfect balance that makes these bites irresistibly creamy yet light. Since there’s no baking involved, they’re a fantastic option when you need something impressive without the hassle.
One tip I discovered is to let the bites chill in the fridge for at least an hour before serving. This allows the flavors to meld beautifully and the texture to firm up, giving you that perfect bite-sized treat that just melts in your mouth. They’re always a crowd-pleaser!
Why You Will Love These Mini Cheesecake Bites
- Rich and creamy filling with a luscious texture
- Quick to prepare with no baking required
- Adaptable toppings for every occasion
Understanding the Ingredients
The key to a perfectly creamy cheesecake filling lies in the quality of the cream cheese. I recommend using full-fat cream cheese for that rich flavor and smooth texture. Let's not forget the role of whipped cream, which adds lightness and a delightful fluffiness, balancing the density of the cream cheese. For an extra flavor boost, try using a vanilla bean instead of vanilla extract. The tiny flecks of bean will not only enhance the flavor but also add visual appeal.
The crust is just as important as the filling—made easy with graham cracker crumbs, melted butter, and sugar. If you're looking for a twist, consider substituting crushed Oreos or digestive biscuits for a different flavor profile. Just remember, the crust should be firmly pressed to ensure it holds together when you pop the cheesecake bites out of the muffin tins. You want it golden brown with a little crunch, signaling that it's ready to support the creamy filling.
Perfecting the Assembly
When it comes to assembling your cheesecake bites, precision matters. Use a piping bag or a zip-top bag with one corner snipped off to distribute the filling evenly across the crust. This technique not only makes for less mess but also helps prevent air bubbles, giving your bites a smooth finish. When smoothing the tops, a small offset spatula can provide a clean, level surface just before chilling.
Allowing these cheesecake bites to set properly is essential. While one hour in the refrigerator will suffice for a light set, I prefer to let them chill for at least two hours—or even overnight—for optimal texture. This waiting period allows the flavors to meld beautifully while ensuring that the bites hold their shape when removed from the tins. If you find the bites are sticking, gently run a knife around the edges before lifting them out.
Ingredients
For the Cheesecake Filling
- 8 oz cream cheese, softened
- 1/3 cup granulated sugar
- 1 tsp vanilla extract
- 1/2 cup whipped cream
For the Crust
- 1 cup graham cracker crumbs
- 1/4 cup melted butter
- 2 tbsp sugar
Instructions
Instructions
Prepare the Crust
In a bowl, combine graham cracker crumbs, melted butter, and sugar. Mix well until all crumbs are moistened. Press the mixture into the bottom of mini muffin tins to form a crust.
Make the Cheesecake Filling
In another bowl, beat the softened cream cheese with granulated sugar and vanilla extract until smooth. Gently fold in the whipped cream until fully combined.
Assemble the Cheesecakes
Spoon the cheesecake filling over the prepared crust in the muffin tins. Smooth the tops with a spatula.
Chill and Serve
Refrigerate the cheesecake bites for at least 1 hour to allow them to set. Once chilled, remove from the muffin tins and enjoy!
Tips
For variations, try adding different toppings such as fruit, chocolate sauce, or caramel!
Pro Tips
- These mini cheesecakes can easily be customized with your favorite flavors or pairings.
Storing and Making Ahead
These mini cheesecake bites are perfect for prepping ahead of time, making them an ideal dessert for entertaining. Once they've set, store them in an airtight container in the refrigerator, where they can last for up to a week. Covering them prevents them from absorbing any odors and keeps their creamy texture intact.
If you want to extend their shelf life, consider freezing them! Just ensure they're well wrapped, either individually or in a single layer followed by plastic wrap and aluminum foil. They can be frozen for up to three months. To enjoy, simply transfer them to the refrigerator for a few hours to thaw before serving.
Serving and Topping Ideas
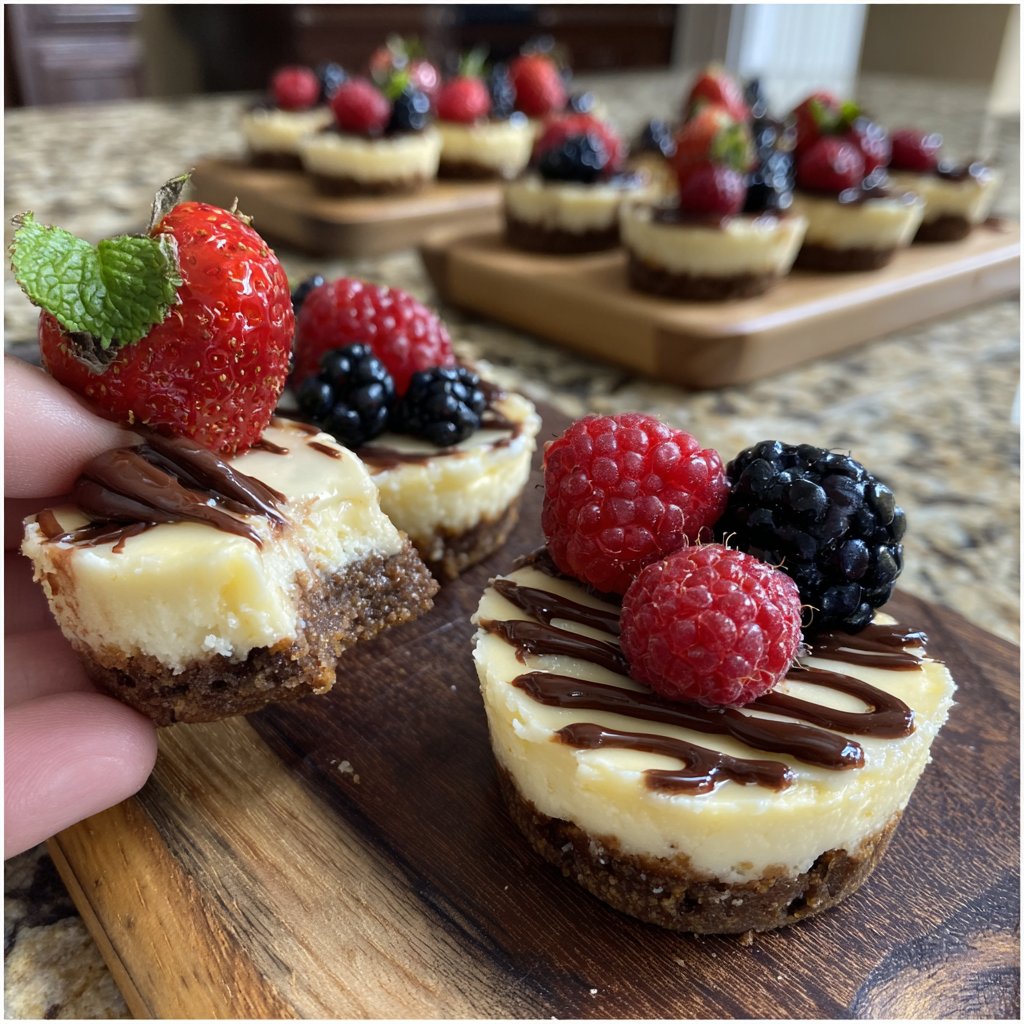
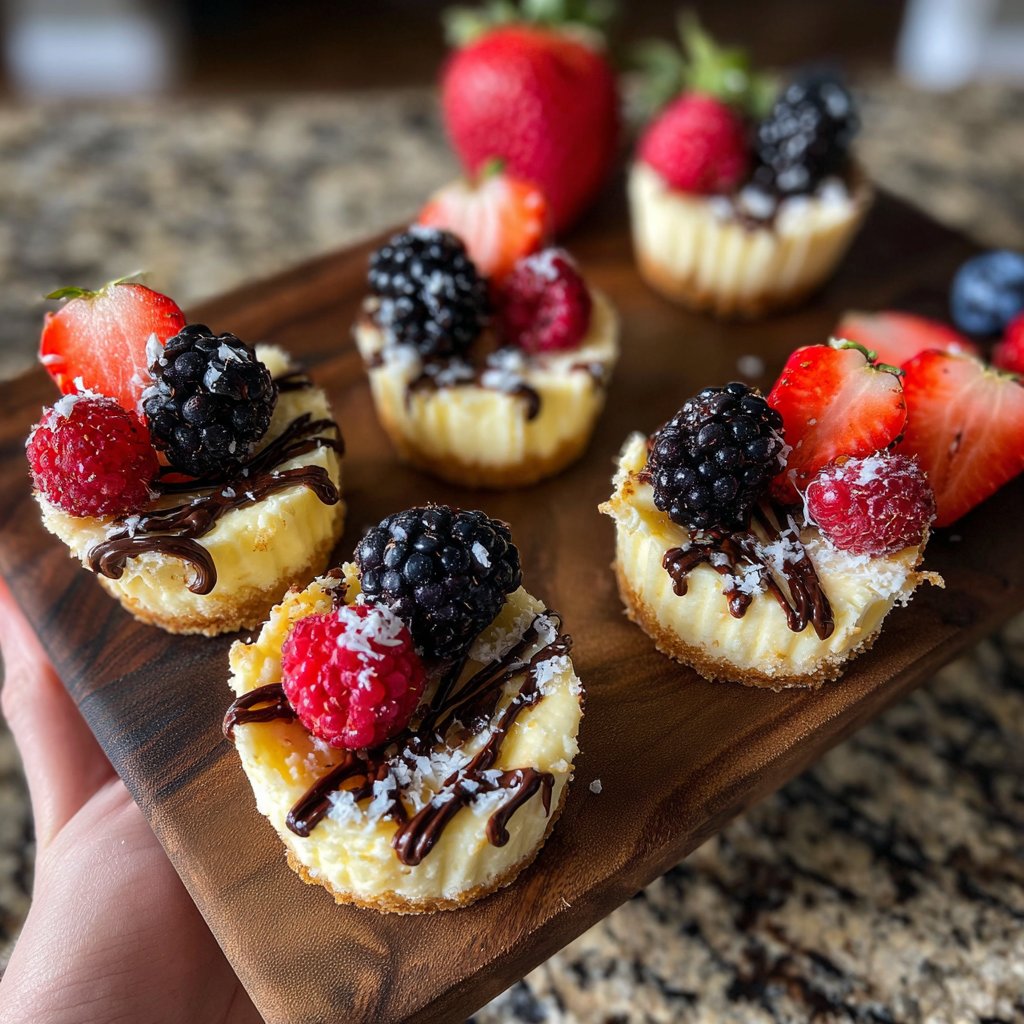
The beauty of these cheesecake bites is their versatility. While delicious on their own, I love to elevate them with various toppings. Fresh berries or a drizzle of chocolate or caramel sauce can enhance both appearance and flavor. A sprinkle of crushed nuts or toffee bits can provide an unexpected crunch that contrasts with the creamy filling.
For themed gatherings, consider adjusting the flavors to match the occasion. A hint of lemon zest can introduce a refreshing citrus note for spring events, while pumpkin spice can transform them into the perfect autumn treat. These adaptations allow you to customize each batch for different holidays or celebrations, ensuring they remain a delightful surprise for your guests.
Questions About Recipes
→ Can I use low-fat cream cheese for the filling?
Yes, low-fat cream cheese can be used, but it may slightly alter the texture.
→ How long can I store these mini cheesecakes?
They can be stored in the fridge for up to 3 days in an airtight container.
→ Can I freeze the mini cheesecake bites?
Yes, they freeze well! Just ensure they're in a sealed container and they can last for up to a month.
→ What other flavors can I incorporate?
You can add fruit purees, chocolate, or even caramel to the filling for different flavor profiles.
Effortless Mini Cheesecake Bites
Created by: The Xandersrecipes Team
Recipe Type: Tasty Pastries
Skill Level: Beginner
Final Quantity: 12 bites
What You'll Need
For the Cheesecake Filling
- 8 oz cream cheese, softened
- 1/3 cup granulated sugar
- 1 tsp vanilla extract
- 1/2 cup whipped cream
For the Crust
- 1 cup graham cracker crumbs
- 1/4 cup melted butter
- 2 tbsp sugar
How-To Steps
In a bowl, combine graham cracker crumbs, melted butter, and sugar. Mix well until all crumbs are moistened. Press the mixture into the bottom of mini muffin tins to form a crust.
In another bowl, beat the softened cream cheese with granulated sugar and vanilla extract until smooth. Gently fold in the whipped cream until fully combined.
Spoon the cheesecake filling over the prepared crust in the muffin tins. Smooth the tops with a spatula.
Refrigerate the cheesecake bites for at least 1 hour to allow them to set. Once chilled, remove from the muffin tins and enjoy!
Extra Tips
- These mini cheesecakes can easily be customized with your favorite flavors or pairings.
Nutritional Breakdown (Per Serving)
- Calories: 250 kcal
- Total Fat: 18g
- Saturated Fat: 10g
- Cholesterol: 50mg
- Sodium: 120mg
- Total Carbohydrates: 22g
- Dietary Fiber: 1g
- Sugars: 10g
- Protein: 3g